
Hello CC Group!
We’re testing Graphics Element for a mission and we observed that it doesn’t help drawImage api though it’s based mostly on internet canvas’ drawing APIs. So, will there any help for it sooner or later?
Or any concept how we will obtain this utilizing no matter out there in Cocos Creator?
Principally, we wished to transform our HTML5 canvas app (drafting board) to a Cocos’ mission. “drawImage” is getting used for portray textures on the drafting board. Please discover the screenshot of the simplified app beneath: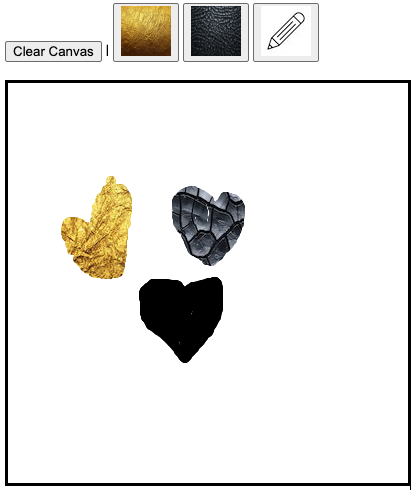
Hello, there, we’re simulating the API set of Canvas graphics for frontend devs to be aware of, however it’s not based mostly on Canvas technically.
The impact you wish to obtain may be achieved with Masks with graphics stencil, you simply set the stencil sort to graphics, and use the associated graphics part to attract the stencil as you usually do, and it’ll masks the remainder of the picture.
https://docs.cocos.com/creator/handbook/en/ui-system/elements/editor/masks.html?h=masks
1 Like
Hello hello, thanks in your reply. Please discuss with the video beneath:
With a view to work as above utilizing masks, how are we going to rearrange (the z-orders of) photographs? Or possibly I didn’t get your means of the answer. Please kindly clarify to me once more.
I used to be excited about; I would wish one thing like “drawing part of a picture on one other picture or canvas”. Do we now have an API like that?
Every time you modify a stencil picture you might want to add a brand new Node with Masks part (Graphics stencil) and the order of Masks node will decide the drawing order
Now, I roughly obtained the concept of you what you had been saying.
Because it’s for a drafting board app / coloring app,
- every time the person adjustments the coloring device (not stable colours, they are going to be photographs)
- we should create a brand new node with masks?
As within the video above,
- when the person selects Gold texture and paints someplace, then we create a brand new node with gold
- then, when the person selects Black Leather-based texture, we create a brand new node
- then, when the person switches again to Gold, we will’t reuse the earlier node with gold (since it’ll mess up the rendering order), and we should create a brand new node once more
- if the person switches the instruments a couple of hundred occasions (for a severe person, this may very well be the case), we should create a whole lot nodes? Will there be any efficiency affect?
Please right me if I’m mistaken.
I see, in that case, what I proposed might be too heavy.
I counsel you to make use of immediately graphics part, however with customized materials
https://docs.cocos.com/creator/handbook/en/ui-system/elements/editor/graphics.html
Vital work to do
- Replicate builtin-graphics impact, modify it to help texture portray with uv tiling
- Every time the comb adjustments, a brand new Graphics should be created (for ordering), the feel should be modified for the fabric occasion
1 Like
I’ve achieved this with assist of Grok AI on Creator 3.85
That is the customized impact for the customized materials used for cc.Graphics, in case another person want it
CCEffect %{
methods:
  - passes:
      - vert: vs:vert
        frag: fs:frag
        blendState:
          targets:
            - mix: true
              blendSrc: one
              blendDst: one_minus_src_alpha
              blendSrcAlpha: one
              blendDstAlpha: one_minus_src_alpha
        rasterizerState:
          cullMode: none
        depthStencilState:
          depthTest: false
          depthWrite: false
        properties:
          mainTexture: { worth: white }
}%

CCProgram vs %{
precision highp float;

#embrace
#embrace

in vec3 a_position;
in vec4 a_color;
out vec4 v_color;
in float a_dist;
out float v_dist;
out vec2 v_texCoord;

vec4 vert () {
    vec4 pos = vec4(a_position, 1);
    pos = cc_matViewProj * cc_matWorld * pos;  // Apply digital camera transformation to place
    v_color = a_color;
    v_dist = a_dist;
    // Generate texture coordinates based mostly on native place, impartial of digital camera
    v_texCoord = a_position.xy * 0.5 + 0.5;  // Map native [-1, 1] to [0, 1]
    // Apply handbook scaling
    float scaleX = 0.01;  // Modify this worth to scale horizontally
    float scaleY = 0.01;  // Modify this worth to scale vertically
    v_texCoord *= vec2(scaleX, scaleY);  // Apply scaling after normalization
    return pos;
}
}%

CCProgram fs %{
#pragma extension([GL_OES_standard_derivatives, __VERSION__
To use it
- Save the code above as “Custom-Graphics.effect” into project /assets
- In Cocos Assets panel, search “ui-graphics-material.mtl” from internal, copy to /assets & rename it to whatever you want (ex: “graphics-material-1”)
- Click the new material, select “assets/Custom-Graphics.effect” as effect, expand “Pass 0” & drag your texture to “Main Texture”
- Save the material
- Now in cc.Graphics component, drag “graphics-material-1” into Material box
Boom! Done
Enjoy it ![]()
